Category Archives: Tutorials

Bokeh Effect Technique

Hi! I am back with another card I would like to share with you. I have been seeing this new technique called the Bokeh effect and as a photographer I am familiar with the term but just recently learned how to incorporate it into card making. I headed over to YOUTUBE to check out a few ways people have tried this technique and decided to try it out. So the first thing I did was take a piece of watercolor paper (cut down to 4.25 by 5.5) and saturated the card with water. I then used my peerless watercolors to make a background. The next step is to add the circles which is what will give the Bokeh effect. To stamp the circles I cut a piece of acetate paper using my circle spellbinders. I then used this as a stencil. Since I didn’t have white ink I used what I had in hand which was white acrylic paint. So for the larger circles I used less paint and as the circles got smaller I used more paint and that is how to create that effect. I then cut out a digi image from A Day for Daisies (I loveeee these stamps) and used one of there new fairy stamp release. I added some new mini sequins, moonshine sequins and star sequins(sequins coming soon to the shop) on the card near her wand so as to look like it’s coming out of it. The sentiment is from a papertrey ink stamp set I had and voila here is the card…..

IMG_3422

Thank you for stopping by and Happy Crafting!!!

Advent Calendar

Hello crafters!!! Wow holidays are approaching fast and of course I decided to take on a few projects like Dec daily and an advent calendar ( I blame Nicole for all of this). The good thing is that I am doing pretty good with timing(First time!) I usually wait till the last minute to do stuff and then I either do not finish it or just lose to mojo to do it.

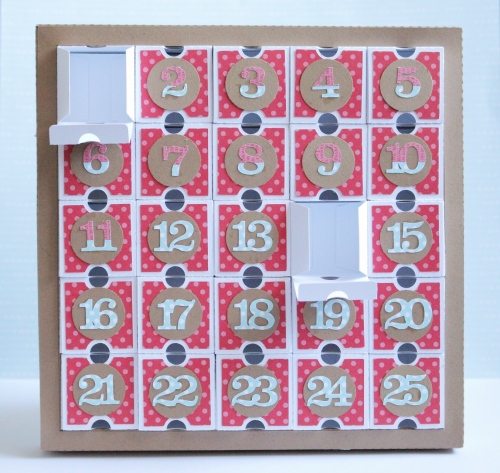
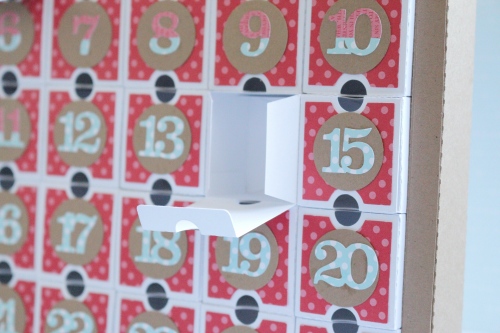
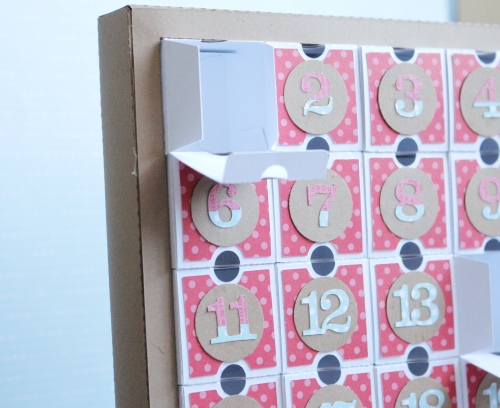
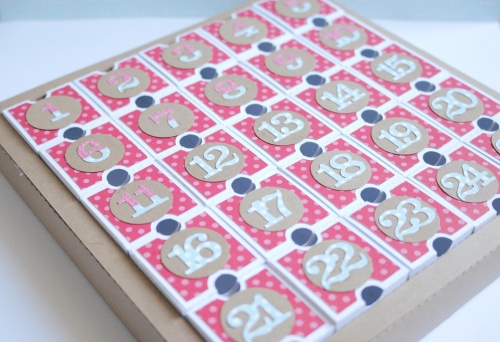
So this year I decided to do an advent calendar after Nicole showed me hers. I couldn’t decide what kind of calendar to do and after searching through the silhouette online store I found the perfect cut file by Lori Whitlock. Now the cut file is for a 12×12 machine but I ended up resizing it to about 8×8 and I am perfectly fine with that size.

So here is my plan. I am going to buy a small lego set and then put the pieces in all 25 boxes so that way my son can built the set little by little. I will include just the instructions needed to put together the pieces for that date. Hopefully my son will enjoy it.

Well thank you for stopping by and happy crafting!!

IMG_1833 IMG_1834 IMG_1835 IMG_1839

Holiday Card Series with Lawn Fawn

I’m back! Here is my second post of the day. I  would like to try out a Holiday Card series. This will be my first one in the series and I will try to  have a video up soon on how I created this card.

Well if you haven’t heard Lawnscapping Challenges has a DT call for their Facebook Inspiration team so I decided to give it a try.

For this card I used a few techniques that I have learned from Jennifer McGuire. She is truly an inspiration and an amazing and kind person.

So I first started out with a white piece of cardstock which I distressed to look like a winter night sky. I then embossed it with some glitter and then I used a snow stencil that I created on my silhouette program and used some embossing paste. While I let that dry I copic colored some bunnies from the “Snow Day” stamp set and then fussy cut them out. I then adhered some acetate paper onto another piece of white cardstock (which I cut out a window to) and then embossed the sentiment from the “Joy to the woods” stamp set onto the acetate sheet. I added some of my new  holiday sequins (available soon) onto the cardstock with the night sky and adhered the window cardstock to the sky cardstock with some foam adhesive. I really love how the glitter and falling snow look on this card and I see myself using this for a lot of my christmas cards and tags.

IMG_0874IMG_0875IMG_0873 Well thanks for stopping by and Happy crafting!

V’s Sweet “Little Notes” Stamp Set

I’m back with another post today. I’m on a roll. On this post I would like to share with you a youtube video I created showing you how I make my son’s lunch notes using my new Little Notes stamp set.

Last year I would always include a lunch note for my son and sometimes stamp a cute image and then it occurred to me that I should create a stamp set with cute images and puns to go with it and that is how Little Notes came about. When my son saw this stamp set he just loved it and was already telling me which image he wanted on what day. He even showed it off to his teacher. He just loves the little notes.

In the video I show you how quick and easy it is to make a lunch note for someone special. When you are ready to purchase your own set go ahead and click here. Thanks for stopping by and Happy Crafting!!


LittleNotes photo

Baby Love tagged

Good afternoon crafters! Today I actually had time to create. It’s hard when you have a one year old running around the house but I was able to whip up a super cute tag while he napped. I had popped by the simon says stamp challenge blog and saw that they had a tag challenge going on. I recently ordered some tags on etsy and so I thought this challenge was the perfect opportunity to try out those tags. My brother had asked me to make him a baby shower card so I knew the theme would be a baby one. (sorry bro, I know you asked for a card but I made a tag) I couldn’t decide what technique to use so I decided to distress my tag using a few different Tim Holtz inks. I used my Baby Love stamp set and needed a background for my giraffe. I also white heat embossed some stars on the top. I then stamped two sayings on the tag and used a banner I had cut out using my silhouette. I added some sweet dots, ribbon and some wink of stella clear glitter to finish it off. I will hopefully post a video on youtube on how I distress my tag and will add the link on this post. I will also list the supplies down below. Well thanks for stopping by and happy crafting!!

Tag tag2 tag3

Tim Holtz Distress inks:

crushed olive

peeled paint

mustard seed

barn door

broken china

faded jeans black soot

V’s Sweet Ideas “Baby Love” Stamp set

Seam Binding Ribbon at V’s Sweet Shop

Poppy Sweet Dots by V’s Sweet Ideas

Challenges entered

Simon Says Stamp Wednesday Challenge